 Deutsch
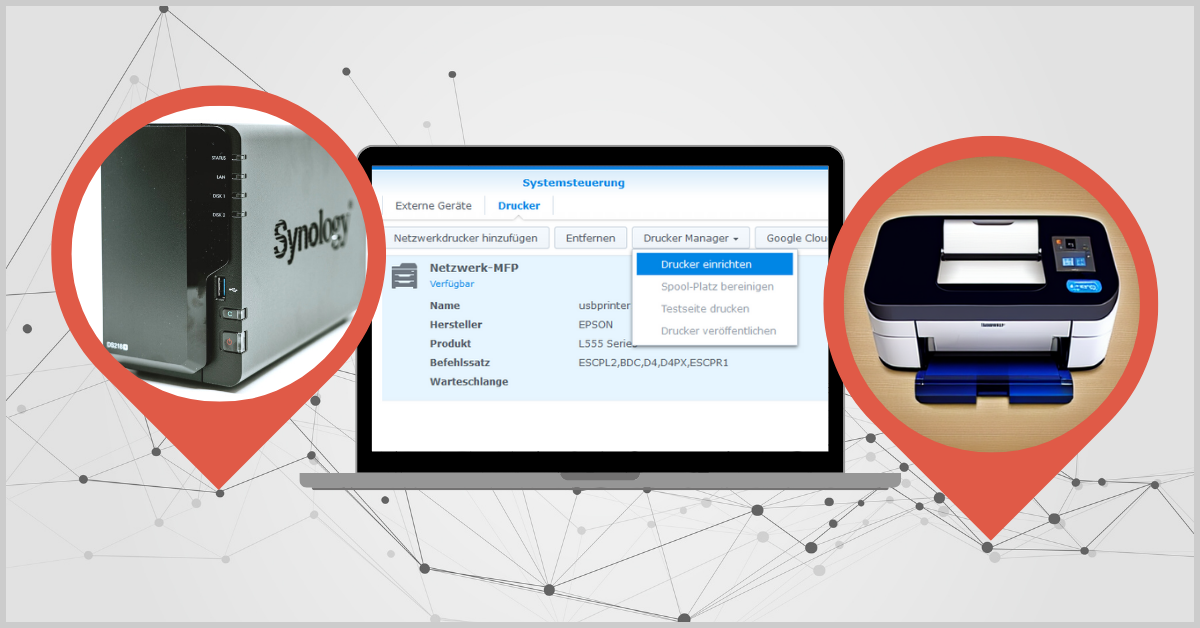
Want to turn a non-network printer into a network printer?
Synology Diskstation makes it possible!
In the following, the Diskstation DS218+ and an Epson L555 printer are used. In principle, however, the procedure can also be applied to other Diskstation and printer models.
Notice:
This is a translation of the German article. Please note that especially menu names, button labels, names, screenshots etc. might not be translated (correctly). Feel free to let us know in the comments if you notice any errors.
On the Synology Diskstation
Connect the printer
Connect your printer to a free USB port on the Diskstation and turn on the printer.
Settings on Diskstation (DSM)
Log in to the web interface of your Diskstation (DSM) as administrator.
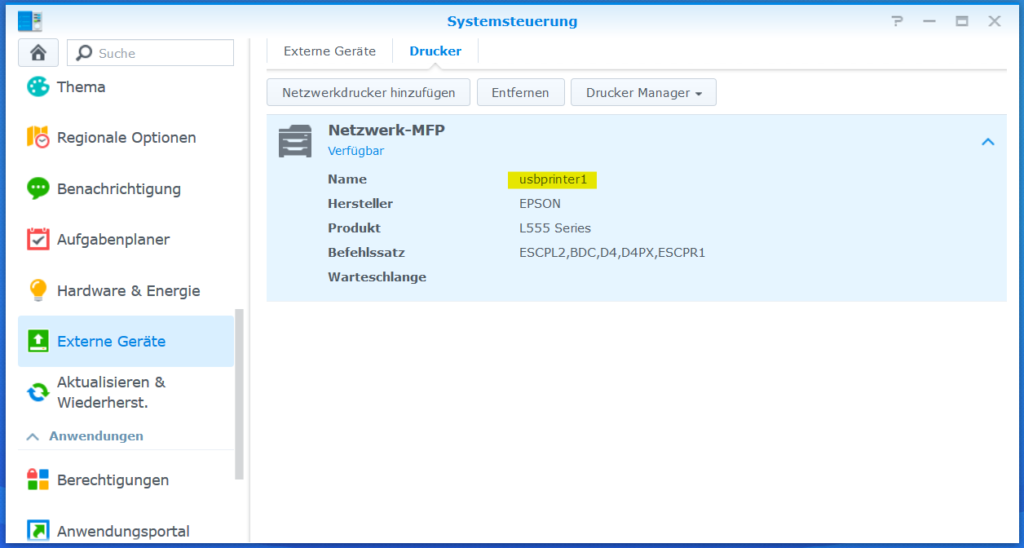
Then open the “Control Panel” and click on “External Devices” and select the “Printers” tab. The printer connected via USB cable will be automatically detected and displayed by Diskstation.
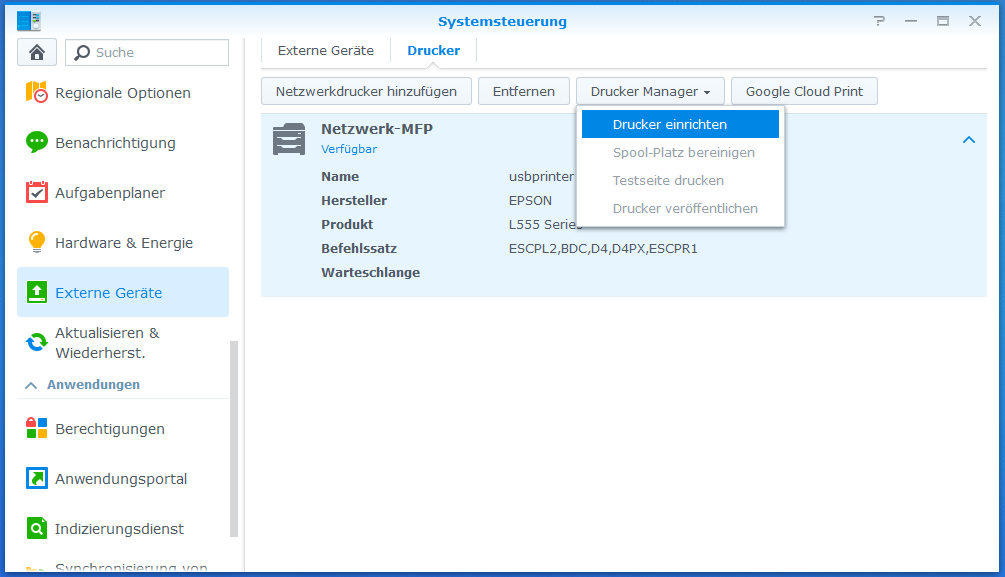
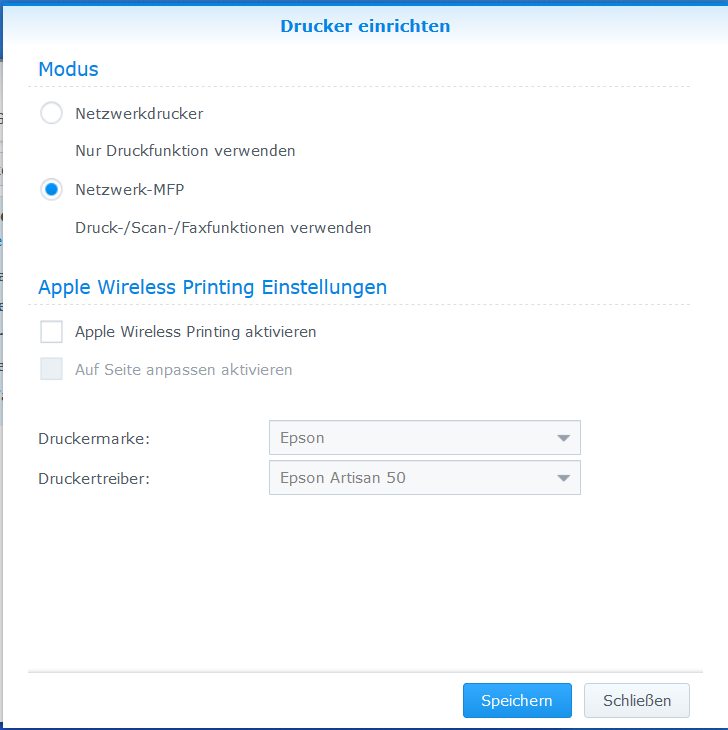
Select the printer in the list and click on “Printer Manager” -> “Printer Setup”. If you have a multifunction device (MFP) that combines printer/scanner/copier in one device, “Network MFP” should be selected. If it is a pure printer, then select “Network Printer”. Save the settings. Nothing else needs to be set on the Diskstation.
Limitations
The print servers of NAS systems do not always cover the entire range of functions of printer manufacturers. For this reason, the status monitor does not work for some printers, which can otherwise be used to view the ink levels, among other things. Many thanks to Jürgen for pointing this out in the comments. For example, on his Canon iP4300, the status monitor only says “Printer not responding.”
Setup on Windows PC
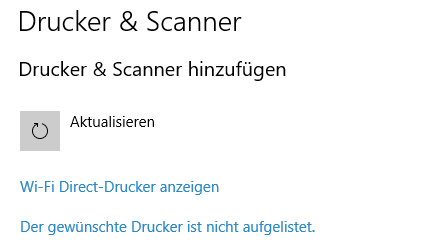
On your Windows computer, open the Start menu and type “Printers” in the search box. Open the “Printers & Scanners” entry.
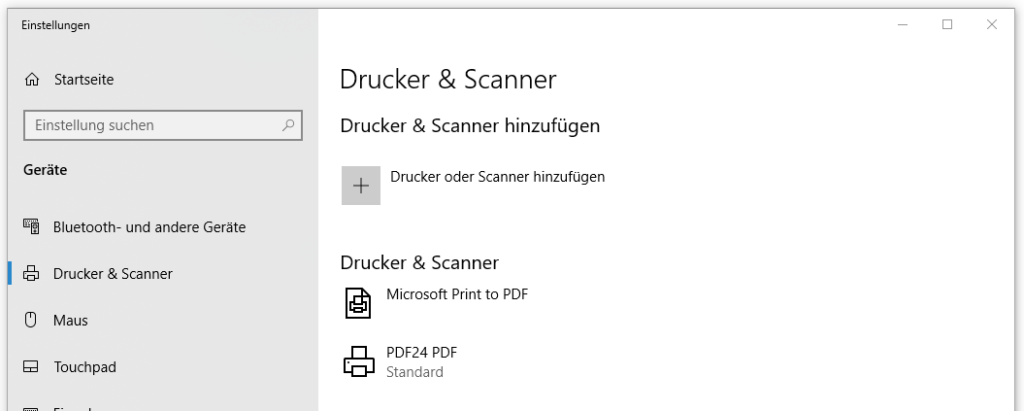
Click on “Add printer or scanner” and wait until the entry “The desired printer is not listed.” is displayed and click on it.
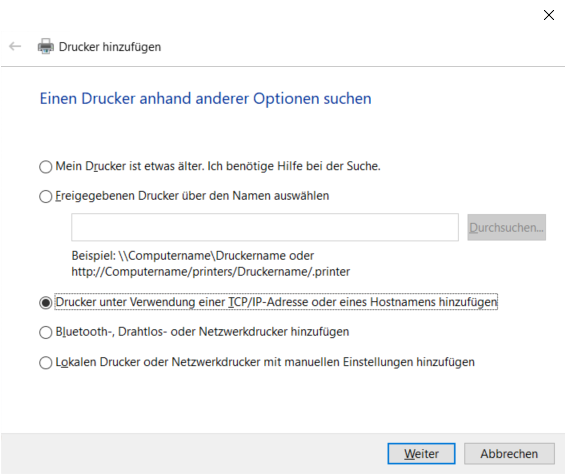
In the newly opened window, select the option “Add a printer using a TCP/IP address or hostname” and click “Next”.
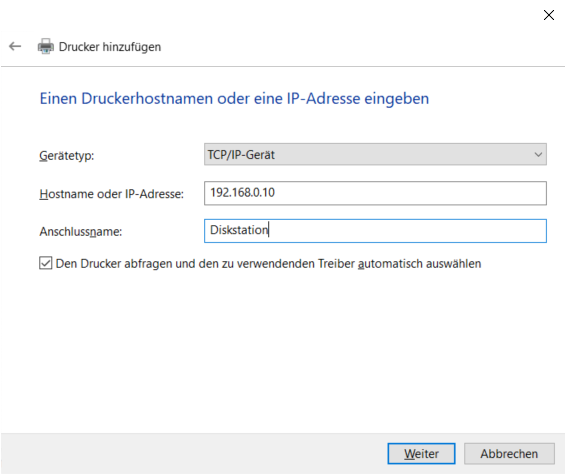
Then you need to select “TCP/IP Device” in “Device Type” and enter your Diskstation’s IP address in “Hostname or IP address”. If you do not know the IP address of your Diskstation, go to the web interface of the Diskstation (Synology “Diskstation Manager” = DSM) to Control Panel -> Network -> LAN and take the IP address displayed there (not the IPv6 address). At “Connection name” you can enter any name, e. g. “Diskstation”. Leave the below checkmark checked and click on “Next”.
In the following step “Detect TCP/IP port” you have to wait one or two minutes until the window “Additional port information required” appears. There, click on the option “Custom” and click on “Settings…”.
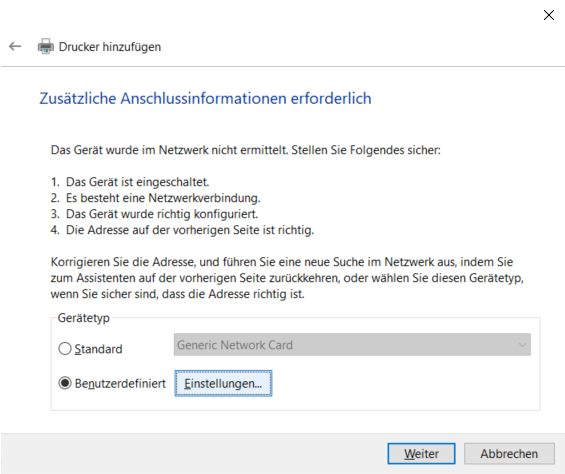
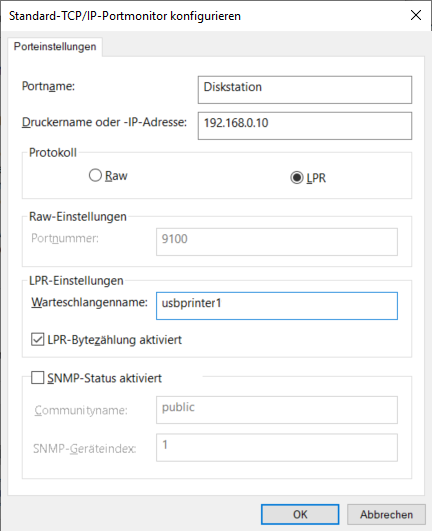
In the newly opened window, set the protocol to “LPR” and in the “LPR settings” section, under “Queue name”, enter the name that the Diskstation displays on the printer setup page for the printer, in this case “usbprinter1”. [Thanks to Korniman for the hint in the comments!] Then check “LPR byte counting enabled” and close the window with “OK”.
After clicking on “Next” you have to wait again up to two minutes until the process “Driver model is determined…” is completed.
- In the next step, “Install the printer driver”, you can select the manufacturer and the printer model from the list that appears. If your model is not displayed, go to the printer manufacturer’s website and download the appropriate driver for your printer model. Then click on “Disk…” and select the downloaded driver file.
- If you are then asked “Which driver version do you want to use?”, we want to “Use the currently installed driver (recommended)”.
- Then we assign a printer name under which the printer should be displayed under Windows (e. g. manufacturer and model name).
- Then for “Printer sharing” we select “Do not share printer” and click on “Next”.
- Finally, you can optionally set the printer as the default printer and finish the setup on the Windows PC by clicking on “Finish”.
Test printer or multifunction device
Now we still want to test whether everything has worked.
Test printouts (for printer and multifunction devices)
After the successful setup, click on the newly added printer in the “Printers & Scanners” window in the Windows settings. Then click “Manage” and click “Print Test Page”.
Testing the scanner function (only for multifunction devices)
Open the Windows built-in “Scanner” application. The application does not detect a connected scanner and says “Connect a scanner first”. I have not been able to solve this problem yet.
Titelbild: Synology Diskstation by Claudio Schwarz on Unsplash, printer AI generated by Stable Diffusion, modified with Canva
Leave a Reply